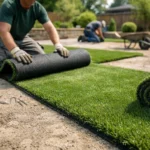
A patchy lawn can make the whole yard feel unfinished. That is why artificial grass installation DIY appeals to so many Melbourne property owners – it promises a cleaner look, less mowing, and a faster way to tidy up outdoor areas without ongoing turf headaches.
The catch is that synthetic turf only looks premium when the groundwork is right. A neat roll of grass laid over a rushed base will show every dip, wrinkle and soft spot. If you are weighing up whether to tackle it yourself or bring in a professional, the smartest approach is to understand where the job is straightforward, where it gets technical, and what can go wrong in Australian conditions.
Is artificial grass installation DIY worth it?
For a small, simple area, it can be. If the site is flat, access is easy, drainage is already decent, and you are comfortable using compacting equipment, a DIY install may save on labour. Courtyards, narrow side paths and small backyard zones are usually the most realistic places to try it.
It becomes less practical when the space is large, sloped or irregular, or when you need edging, drainage correction or a polished finish around paving, garden beds and pool areas. That is where experience matters. The visible turf is the easy part. The hidden structure underneath is what decides whether the surface stays level, drains properly and lasts.
What the job actually involves
Many people assume artificial grass installation DIY means rolling out the turf, trimming the edges and fixing it in place. In reality, most of the time is spent preparing the foundation.
First, the existing grass, weeds and organic material need to come out. Then the site has to be excavated to the correct depth, graded for drainage, and filled with a compacted crushed rock base. In many cases a bedding layer is added on top to help create a smooth, even finish. Weed suppression and edge restraints also need to be considered before the turf is joined, secured and infilled.
If any one of those stages is rushed, the problems usually appear quickly. Water can pool. The turf can ripple. Seams can open up. The edges can lift. On a hot day, those flaws become even more obvious because synthetic grass reflects shape changes rather than hiding them.
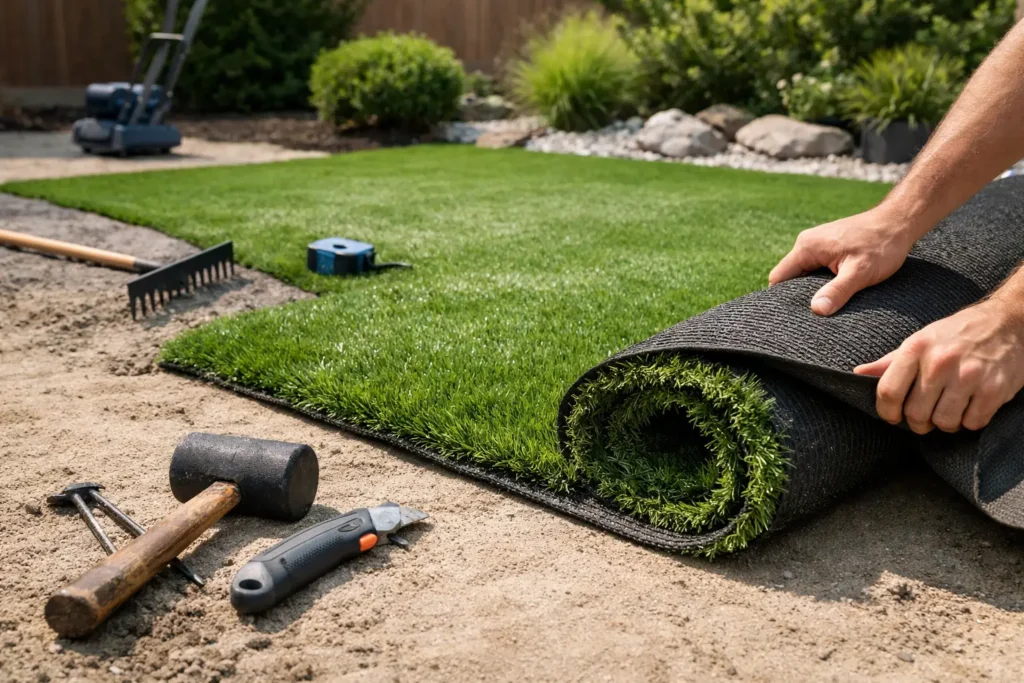
Tools and materials you will likely need
This is one of the biggest surprises for first-time installers. The material cost is only part of the project. You may also need excavation tools, a wheelbarrow, plate compactor, screed rails, cutting blades, joining tape, adhesive, pins or nails, crushed rock, and infill.
Hiring equipment for a weekend can still be worthwhile, but only if the site is ready and you know the sequence. If you spend the first day figuring it out, hire costs rise and the quality usually drops. That is one reason DIY works better for confident renovators than for anyone hoping it will be a quick Saturday job.
How to approach artificial grass installation DIY properly
1. Start with drainage, not turf
Before choosing pile height or colour, look at how water behaves in the area now. Does it already hold water after rain? Does runoff come off a roof, driveway or paved area into that section? If drainage is poor before installation, synthetic turf will not fix it on its own.
A properly prepared base should allow water to move through and away rather than sit under the surface. In Melbourne, where weather can swing from dry heat to heavy rain, this matters more than many people expect.
2. Excavate to the right depth
The required depth depends on the site, the subsoil and intended use. A lightly used decorative strip may need less preparation than a family backyard or commercial frontage that gets regular foot traffic.
Too shallow, and the base will not be stable enough. Too deep without proper compaction, and the surface can settle unevenly over time. The aim is a firm, consistent platform rather than simply removing as much soil as possible.
3. Build a compacted base
This is the stage that separates a professional-looking finish from a disappointing one. Crushed rock should be installed in layers and compacted thoroughly. If the base feels loose underfoot before the turf goes down, it will only worsen later.
The final surface should be smooth and level, with a slight fall where needed to encourage drainage. Small imperfections in the base often become very obvious once the turf is laid.
4. Plan your joins carefully
If the area is wider than a single roll, joins need to be planned before cutting begins. Turf fibres have a grain, and pieces laid in different directions can appear as different shades even when they are the same product.
This is one of the most common DIY mistakes. A join that looks acceptable up close can still stand out badly from the house or patio. Good planning reduces waste and gives the area a more natural, consistent appearance.
5. Secure the edges and apply infill
Edges are often treated as an afterthought, but they matter for both appearance and durability. Without proper restraint, corners can curl and perimeter lines can shift. Infill also helps support the fibres, improve stability and reduce that flat, freshly unrolled look.
Not every turf product uses the same infill approach, so this step depends on what you buy and where it is being installed.
Common problems with DIY installs
The biggest issue is uneven ground. Even a few low spots can make the whole lawn look rushed. Water pooling is another frequent problem, especially where the existing fall of the land was not checked before installation.
Then there are the visual issues. Poor joins, visible cuts, mismatched grain direction and untidy edges can make an expensive turf product look cheap. Around curved garden beds, stepping stones and paved borders, those details become much harder to hide.
Heat is another factor in Australia. Artificial grass can get hot in direct sun, and lower-quality products or poor installation can make that more noticeable. Choosing the right product and installing it over a stable, well-prepared base helps, but it is still something to consider if the area is exposed all day.
When DIY makes sense and when it does not
Artificial grass installation DIY makes the most sense when the space is small, access is easy, and your expectations are realistic. If you are resurfacing a compact courtyard or a simple rectangular side yard, and you have the time to prepare the base properly, you may get a solid result.
It makes less sense when the area needs excavation by machinery, detailed drainage work, premium finishing around hardscaping, or long-term durability under heavy use. Commercial spaces, family backyards with active kids, and front yards where presentation matters most usually benefit from professional installation.
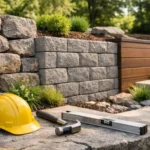
This is also true if the project is part of a wider landscape upgrade. Once retaining, edging, paving, irrigation changes or planting come into the picture, it is often more efficient to have one team coordinate the lot rather than trying to stage it yourself.
Cost savings versus long-term value
Saving on labour is the main reason people attempt DIY, and sometimes that saving is real. But it is only real if the installation does not need to be repaired or redone.
A failed base is expensive because the turf often has to come back up. If adhesive joins fail or drainage is wrong, you are not just fixing a cosmetic issue. You are revisiting excavation, base materials and installation time all over again.
For many property owners, the better question is not whether DIY is cheaper on day one. It is whether it still looks and performs well after summer heat, winter rain and regular use.
Why professional installation can be the safer option
A professional team brings more than labour. They bring judgement. They can assess subgrade conditions, spot drainage risks early, recommend the right turf for the use case, and finish the edges in a way that suits the rest of the landscape.
For clients across Melbourne’s outer suburbs, that local experience counts. Soil conditions, weather exposure and property layouts vary more than people think. A tailored installation usually delivers a better result than a one-size-fits-all method copied from a video.
At Australian Landscape Hub, we see this regularly. Clients often start by asking about a DIY approach and then realise the challenge is not laying the grass itself. It is getting the foundation, drainage and finish right so the lawn still looks sharp months and years later.
A practical way to decide
If you are still considering DIY, be honest about three things: the size of the site, the condition of the ground, and the level of finish you want. If you are happy with functional and the area is simple, DIY might be worth a crack. If you want clean lines, reliable drainage and a result that lifts the whole property, professional installation is usually the stronger investment.
A good artificial lawn should look effortless once it is finished. Getting it to that point rarely is. The best choice is the one that gives you a surface you can trust, not just one that looks good on install day.