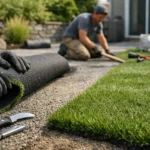
A synthetic lawn can look sharp on day one and still fail within months if the groundwork is rushed. That is why artificial grass installation tools matter far more than most people expect. The turf itself is only part of the result. The tools used to prepare the base, cut the edges, secure the joins and finish the surface are what separate a neat, long-lasting job from one that lifts, wrinkles or drains poorly after the first decent downpour.
For homeowners and property managers, that can be frustrating because many online guides make the process look easier than it is. In practice, the right tools do more than save time. They improve drainage, keep levels consistent, reduce visible seams and help the grass sit naturally under regular foot traffic. On Melbourne sites, where soil conditions, shade, rainfall and heavy use can vary from one property to the next, those details count.
Why artificial grass installation tools affect the finish
Artificial turf installation is a layered job. You are not just rolling out a surface. You are creating a stable foundation, controlling moisture, shaping edges and making sure the turf stays put through changing weather and use. Each stage calls for a different tool, and if one stage is handled poorly, the final result usually shows it.
Base preparation is the biggest example. If excavation is uneven or compaction is weak, the lawn can develop soft spots and shallow dips. If the cutting and joining tools are poor quality, seams become obvious and edges can fray. If the infill is not brushed in properly, the pile can flatten too early. Good tools do not guarantee a good installation, but they remove a lot of the common causes of failure.
The core artificial grass installation tools for each stage
Excavation and site preparation
Every installation starts with clearing the area and removing the existing surface. That usually means a shovel, wheelbarrow, rake and, on larger or more compacted sites, mechanical equipment such as a small excavator or plate compactor hire. The aim is to create a clean, stable area at the correct depth before any base material goes down.
This is also where levels are established. A string line, tape measure and screed rails help keep falls consistent so water moves away properly. On paper, these look like basic items. On site, they are what stop you from ending up with a lawn that puddles near paving, patios or retaining walls.
Base installation and compaction
Once the area is excavated, the base needs to be built and compacted. Crushed rock or similar road base is commonly used, followed by a finer top layer depending on the site and product. The key tool here is the plate compactor. Without it, the base remains loose and can shift over time.
A screed bar or straight edge is also essential at this stage because it helps produce a smooth, even finish before the turf is laid. Small bumps and hollows in the base do not disappear under synthetic grass. They usually become more obvious once the surface settles and sunlight hits it from an angle.
Weed control and separation
A weed barrier is often included to reduce growth through the turf, especially on residential jobs where long-term maintenance matters. The tools are simple here – utility knife, staples or pins, and measuring equipment – but the judgement matters. Not every site needs the same treatment, and drainage should never be sacrificed for the sake of over-layering materials.
That is one of those areas where it depends on the property. A clean new build site behaves differently from an older backyard with established roots, uneven subsoil or drainage history.
Cutting, joining and securing the turf
Sharp cutting tools make a visible difference
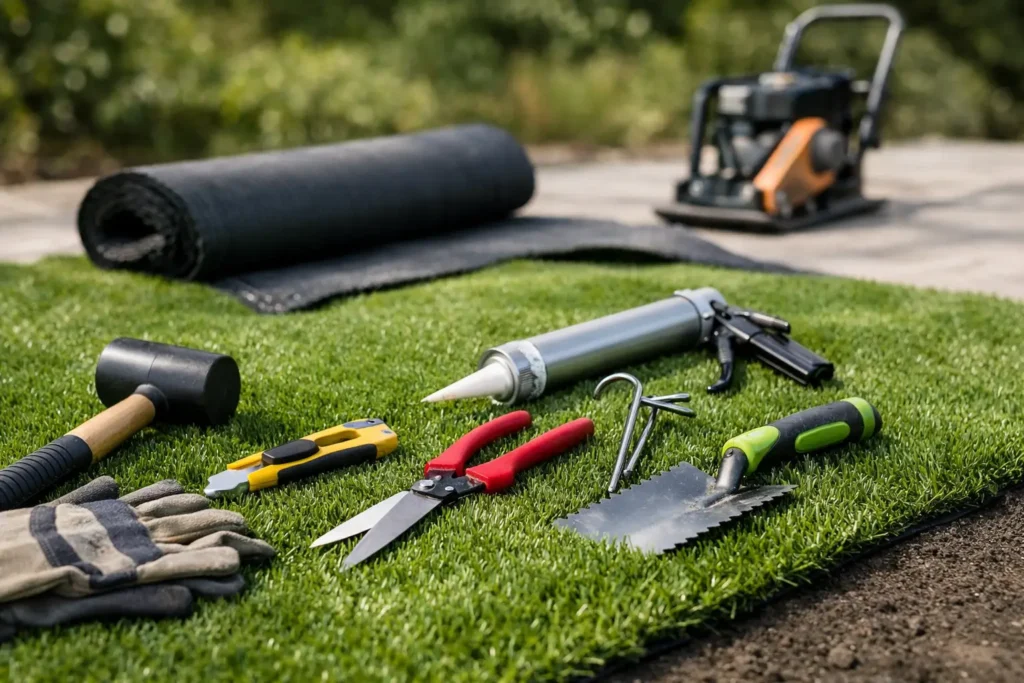
When it comes time to trim the turf, a sharp utility knife is non-negotiable. Blunt blades tear the backing, create ragged edges and make tight fits around garden beds, pavers and curves harder to achieve. Most professional installers go through multiple blades in a single job because clean cuts are worth it.
A good straight edge helps with long runs, while chalk or marking tools help plan cuts before anything is trimmed. Cutting too early or too aggressively can waste material, especially around edges where every line remains visible once the lawn is finished.
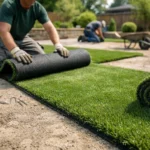
Joining tools for a cleaner seam
If a project needs more than one piece of turf, seam quality becomes one of the biggest indicators of workmanship. Joining tape and adhesive are the core materials, but trowels, spreaders and seam rollers help ensure even contact and reduce high spots.
This is often where DIY installations come unstuck. If the pile direction is not aligned or the edges are pressed too tightly together, the join can stand out. If there is too much gap, the seam reads as a line across the lawn. The right tools help, but patience and layout planning matter just as much.
Pins, nails and edge restraint
Galvanised pins or turf nails are typically used to secure edges and hold the turf in place. A hammer or mallet is the obvious tool, but the real consideration is where and how the fixing is done. Too few fixings and the edge may move. Too many, or poorly placed pins, can distort the surface and create visible dimples.
On some jobs, particularly premium residential landscapes or commercial areas with defined borders, a more structured edge restraint system is the better option. That adds time and cost, but it usually improves durability and gives a cleaner perimeter.
Finishing tools that bring the turf to life
Power broom or stiff brush
Once the turf is down, it needs to be brushed up so the pile stands naturally. A stiff broom can handle smaller areas, but a power broom is often the better choice for larger spaces or denser turf products. It lifts the fibres and helps distribute infill more evenly.
This step is easy to underestimate. Freshly laid turf can look flat or striped if it is not brushed correctly. The difference between an average finish and a professional-looking one often comes down to this final presentation stage.
Infill spreaders and compact finishing tools
Depending on the product and application, kiln-dried sand or another suitable infill may be used to support the fibres and add stability. A drop spreader helps with even distribution, while brushing tools work the infill down into the pile.
Not every artificial lawn uses the same amount or type of infill. It depends on the turf product, intended use and exposure. A family backyard, a display front yard and a commercial walkway may all require different finishing decisions.
Choosing between DIY gear and professional equipment
For a very small, simple area, hiring a few basic tools can be enough. A straight run on firm ground with easy access is one thing. A sloped block, tight side access, poor drainage or multiple curved edges is another.
That is where professional equipment starts to pay off. Commercial compactors, power brooms, quality cutting gear and proper joining tools produce a more consistent result, especially across larger areas. More importantly, experienced installers know when a site needs extra preparation rather than trying to force the turf over a problem that will show up later.
This is often the real trade-off. DIY can reduce upfront cost, but mistakes in base prep, drainage or seam work are expensive to fix once the turf is down. For clients who want low maintenance without ongoing headaches, installation quality usually matters more than saving on tool hire.
What to look for before any tools come out
Before installation begins, the site should be assessed for drainage, traffic, sun exposure, edge detail and intended use. A decorative strip beside a driveway does not need the same construction approach as a pet area, childcare yard or commercial frontage. The tools may overlap, but the installation method should respond to the job.
That is why experienced landscapers approach artificial turf as part of the whole outdoor space, not as a stand-alone product. The lawn has to work with surrounding paving, garden beds, irrigation, levels and access points. On many Melbourne properties, practical details like stormwater movement and seasonal wear are just as important as the initial look.
Australian Landscape Hub sees this regularly on projects where clients want the visual benefit of a fresh lawn without the upkeep of natural turf. The best outcomes come from using the right tools at the right stage, backed by proper site preparation and a finish that suits how the space will actually be used.
If you are planning synthetic turf, it is worth looking past the roll of grass itself and paying attention to the process behind it. The tools may not be the most visible part of the job, but they are often the reason a lawn still looks level, tidy and convincing long after installation day.