
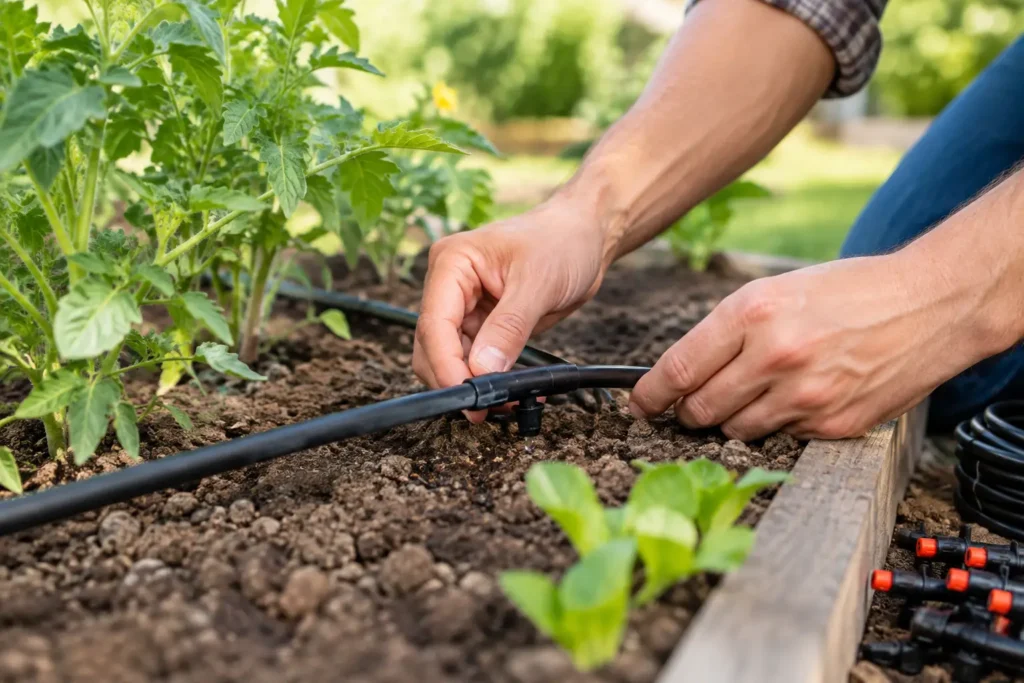
A garden can look healthy one week and stressed the next when summer heat, wind and uneven hand watering take over. When you install drip irrigation in a garden, water is delivered slowly at root level, helping plants establish well without soaking paths, foliage or bare soil. Done properly, it is one of the most practical upgrades for lower-maintenance Melbourne landscapes.
Why drip irrigation is a smart garden investment
Drip irrigation uses poly pipe, dripline or individual emitters to apply measured water close to each plant. Unlike a sprinkler, it does not throw water into the air where it can be affected by wind or lost to evaporation. This makes it especially useful for garden beds beside paving, decks, retaining walls and buildings.
The outcome is not simply a greener garden. Consistent, targeted watering supports deeper root growth, reduces weed pressure in dry areas between plants and avoids the leaf moisture that can contribute to fungal problems. It also gives property owners far more control over watering times and volumes.
That said, drip irrigation is not a fit-and-forget solution. Plants still need different amounts of water depending on their age, species, soil and exposure. A newly planted hedge in full sun has very different needs from a mature shaded bed. The system needs to reflect those differences from the outset.
Plan before you install drip irrigation in a garden
Good irrigation begins with a site plan, not a roll of pipe. Sketch the garden beds, lawn edges, existing trees, taps, paths and structures. Mark plants with similar watering needs, then group them into zones. This lets you water a sunny native garden differently from a shaded fern bed or a vegetable patch.
Check the water source and pressure
Start at the tap or available irrigation connection. A basic pressure and flow check will indicate how much pipe and how many emitters can operate at once. Too many emitters on one line can result in strong flow near the tap and weak output at the far end, leaving parts of the garden under-watered.
Most drip systems benefit from a filter and pressure regulator. The filter keeps sediment from blocking small emitters, while the regulator protects the system from excessive pressure and provides a more even result. If the property uses tank water, filtration is particularly important.
For larger residential, commercial or industrial sites, separate zones operated by solenoid valves are usually the sensible option. An automatic controller can run each zone at appropriate times without relying on someone being on site. Any connection to a mains water supply should meet applicable local requirements, including backflow prevention where required. This is an area where professional advice is worthwhile.
Understand the soil before setting run times
Melbourne properties can have very different soils, even within the same suburb. Heavy clay absorbs water slowly and may puddle if irrigation runs too long. Sandy soil drains quickly and often needs shorter, more frequent cycles. Loam is generally more forgiving, but it still needs observation after installation.
The aim is to wet the active root zone, not leave water sitting on the surface. Run a short test cycle, dig carefully beside a dripper and check how deeply moisture has moved. Adjust timing from what the soil actually does rather than relying on a generic schedule.
Choose the right drip irrigation components
For garden beds with dense, evenly spaced planting, inline dripline is often the cleanest solution. It has built-in emitters at fixed intervals and can be laid in parallel runs below mulch. It works well for hedges, mass planting and productive gardens where water needs to be spread consistently across an area.
Individual drippers offer more flexibility around feature trees, advanced shrubs and plants with wider spacing. They can be placed exactly where they are needed and expanded as the garden matures. Micro-sprays can suit some broad planted zones, but they use more water and are more exposed to wind than true drip irrigation.
Use quality UV-stabilised poly pipe, appropriate fittings, end caps, stakes, filters and pressure regulation. Cheap fittings that split or work loose can undermine an otherwise sound system. It is also wise to use pressure-compensating drippers on sloping sites, where elevation can otherwise cause uneven watering.
A practical installation process
Prepare the beds and layout
Weed the bed, complete major planting and settle the final layout before laying irrigation. Avoid placing pipe where future digging, edging or paving works are likely to damage it. Keep pipe clear of sharp hardscape edges and allow enough room for access around valve boxes and taps.
Lay the main poly pipe from the water source to each zone, keeping runs as direct as practical. Then position lateral lines through the garden. In broad beds, parallel dripline runs should be spaced to suit the soil and planting density. Closer spacing may be needed in sandy soil or densely planted areas.
Place emitters at the root zone
Do not place a dripper against a trunk or plant stem. Set it near the outer root area, where feeder roots can use the water. A small newly planted shrub may only need one emitter, while a larger established tree may need several placed around its drip zone.
As plants grow, move or add emitters rather than expecting one point of water to support a much larger root system. This is one reason accessible pipe and clearly marked zones make ongoing garden maintenance easier.
Flush, test and cover
Before closing the ends of the lines, run water through the system to flush out dirt and plastic fragments. Then cap the lines, turn on each zone and inspect every fitting, dripper and connection. Look for leaks, blocked emitters and areas where water is not reaching the intended plants.
Once the system is working correctly, cover it with mulch. Mulch reduces evaporation, protects the pipe from sunlight and gives beds a finished appearance. Keep mulch slightly clear of plant stems and avoid burying valve boxes or connections that may need servicing.
Mistakes that lead to poor results
Most drip irrigation problems come back to design shortcuts rather than the concept itself. Avoid these common issues:
- Running too many drippers from one zone and losing pressure at the far end.
- Skipping filtration, which allows debris to block emitters over time.
- Using one schedule for every garden bed, regardless of plant type and sun exposure.
- Leaving pipe exposed where sunlight, garden tools or foot traffic can damage it.
- Installing irrigation before the landscape layout is final, then repeatedly cutting and moving lines.
It is also easy to overwater because drip systems look gentle. Water applied slowly can still saturate roots if the run time is excessive. Check soil moisture regularly during the first few weeks, particularly after rain or a sudden cool change.
When a professional installation makes sense
A simple system connected to one tap can be a manageable project for a confident homeowner. However, professional installation is a better option where there are multiple zones, long pipe runs, sloping land, new landscaping works or irrigation integrated with lighting, turf and hardscaping.
For commercial properties, reliability matters just as much as water efficiency. A poorly planned system can leave high-visibility garden areas dry, create slippery overspray near entries or require constant repairs. Designing irrigation as part of the wider landscape build avoids those compromises.
Australian Landscape Hub can plan irrigation around planting, turf, paving and drainage so the finished outdoor area works as one considered system. With more than 20 years of practical landscaping experience, the focus is on a layout that looks good on completion and remains easier to maintain through changing seasons.
Keep the system working through the seasons
Check filters and flush lines at the start of warmer weather, then inspect drippers periodically for blockages or damage. Update the controller as temperatures, rainfall and plant growth change. In winter, many established gardens need substantially less watering than they do in dry summer conditions.
A well-designed drip system should disappear into the landscape while quietly supporting healthier plants and more predictable maintenance. The best time to plan it is before new garden beds are finished, when every line, zone and connection can be installed with the long-term garden in mind.